Community Game Configurations
This page is for game configurations that require elaborate setup. For minor tweaks and settings, use Manacharge's community database. You can link back here in the community database as well.
You can contribute to the community games database here: https://docs.google.com/forms/d/e/1FAIpQLScavGFOuGpEVpyHdRVcPjdrCEquG9ItBaloa8Q0XaiNlu_Afg/viewform
You can view the community database here: https://docs.google.com/spreadsheets/d/1fRqvAh_wW8Ho_8i966CCSBgPJ2R_SuDFIvvKsQCv05w/edit?usp=sharing
Community Game Configurations Table of Contents
RPCS3
Metal Gear Solid 4
Credit: AwkwaBear
NOTE: This guide is just to set up MGS4 and getting it RUNNING WITHOUT CRASHING on Steam Deck, much work is still needed to get it working with an optimized playable configuration free from audio issues and framerate hitching. This page is still a work in progress and will updated as better configuration options are determined
Tutorial
MGS4 when first imported into RPCS3 will freeze natively and needs some work to get functioning.
I believe trying to patch the file using the built in RPCS3 patch manager will not fix the issue and the game needs to be patched manually to get it working. (Let me know if anyone else is able to prove otherwise)
- If you haven't done so already, follow the PS3 setup guide from RGC to get mgs4 added and rpcs3 setup
- Patch using the "Manually adding custom patches" section on this page and the MGS4 patch section in the second link. (You can make the patch yourself using the rpcs3 wiki link or download the one I have made from my github repo linked just below)
- When the instructions say "Save the file in relevant location:" you need to navigate to save it in the flatpack location instead of the usual Linux one. NOTE: ~/.VAR is a hidden directory and you need to click show hidden files in dolphin file explorer to see it.
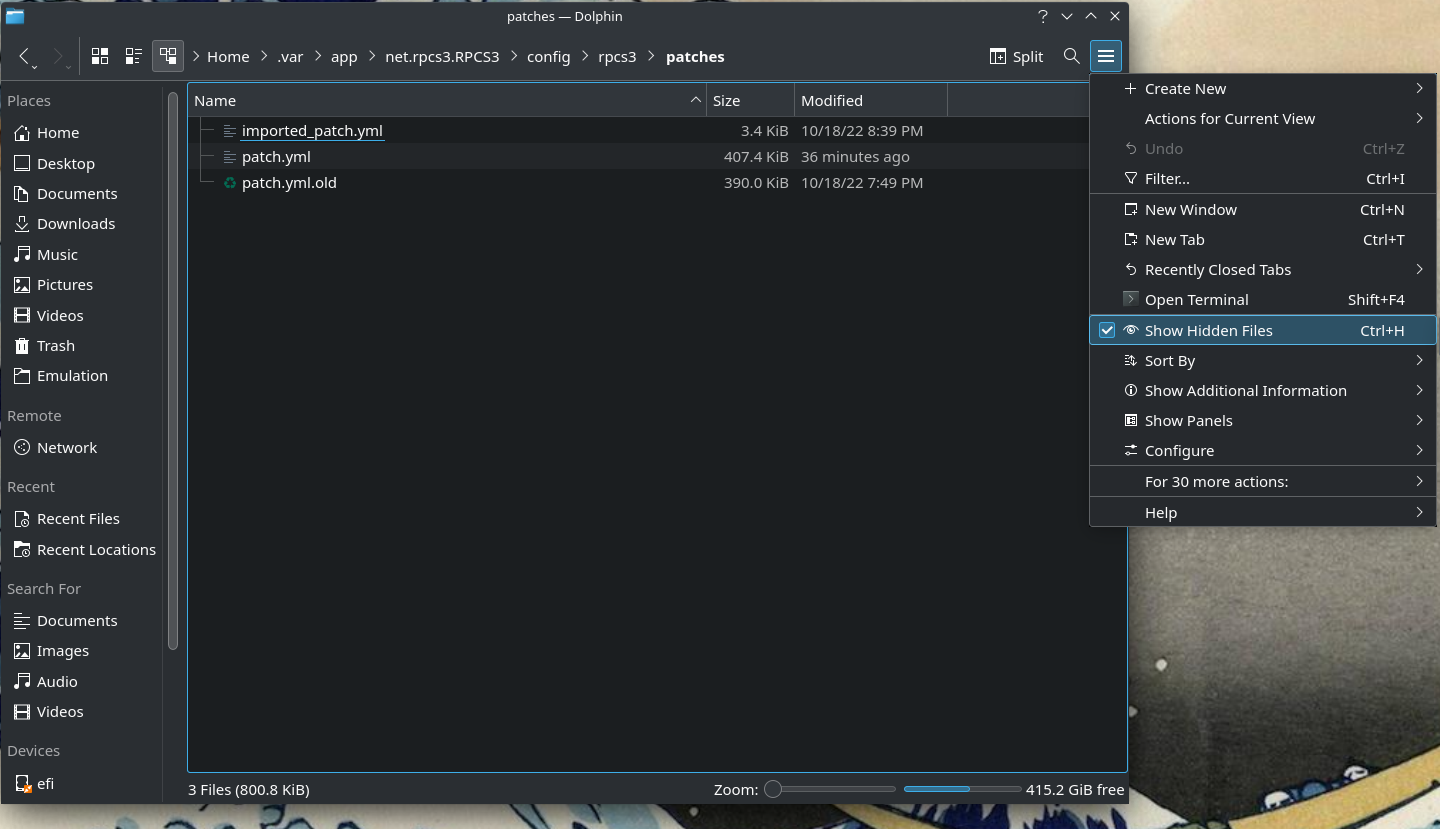
- The location is:
~/.var/app/net.rpcs3.RPCS3/config/rpcs3/patches
- Open RPCS3 Navigate to the Patch Manager (Select Manage > Game Patches) and tick the checkbox corresponding to the patches you wish to apply.
- Select Metal Gear solid 4: Guns of the Patriots in the game list and click the tab to expand
- expand both tabs for the version of the game you have
- select the
cellspurs urgent commands hack - 4.8x(where 'x' is the ps3 firmware version you installed) - select
Crash Fix - select
Disable Shadows - select
Disable spawned effects - select
Reduce Stage quality - select
Unlock FPS 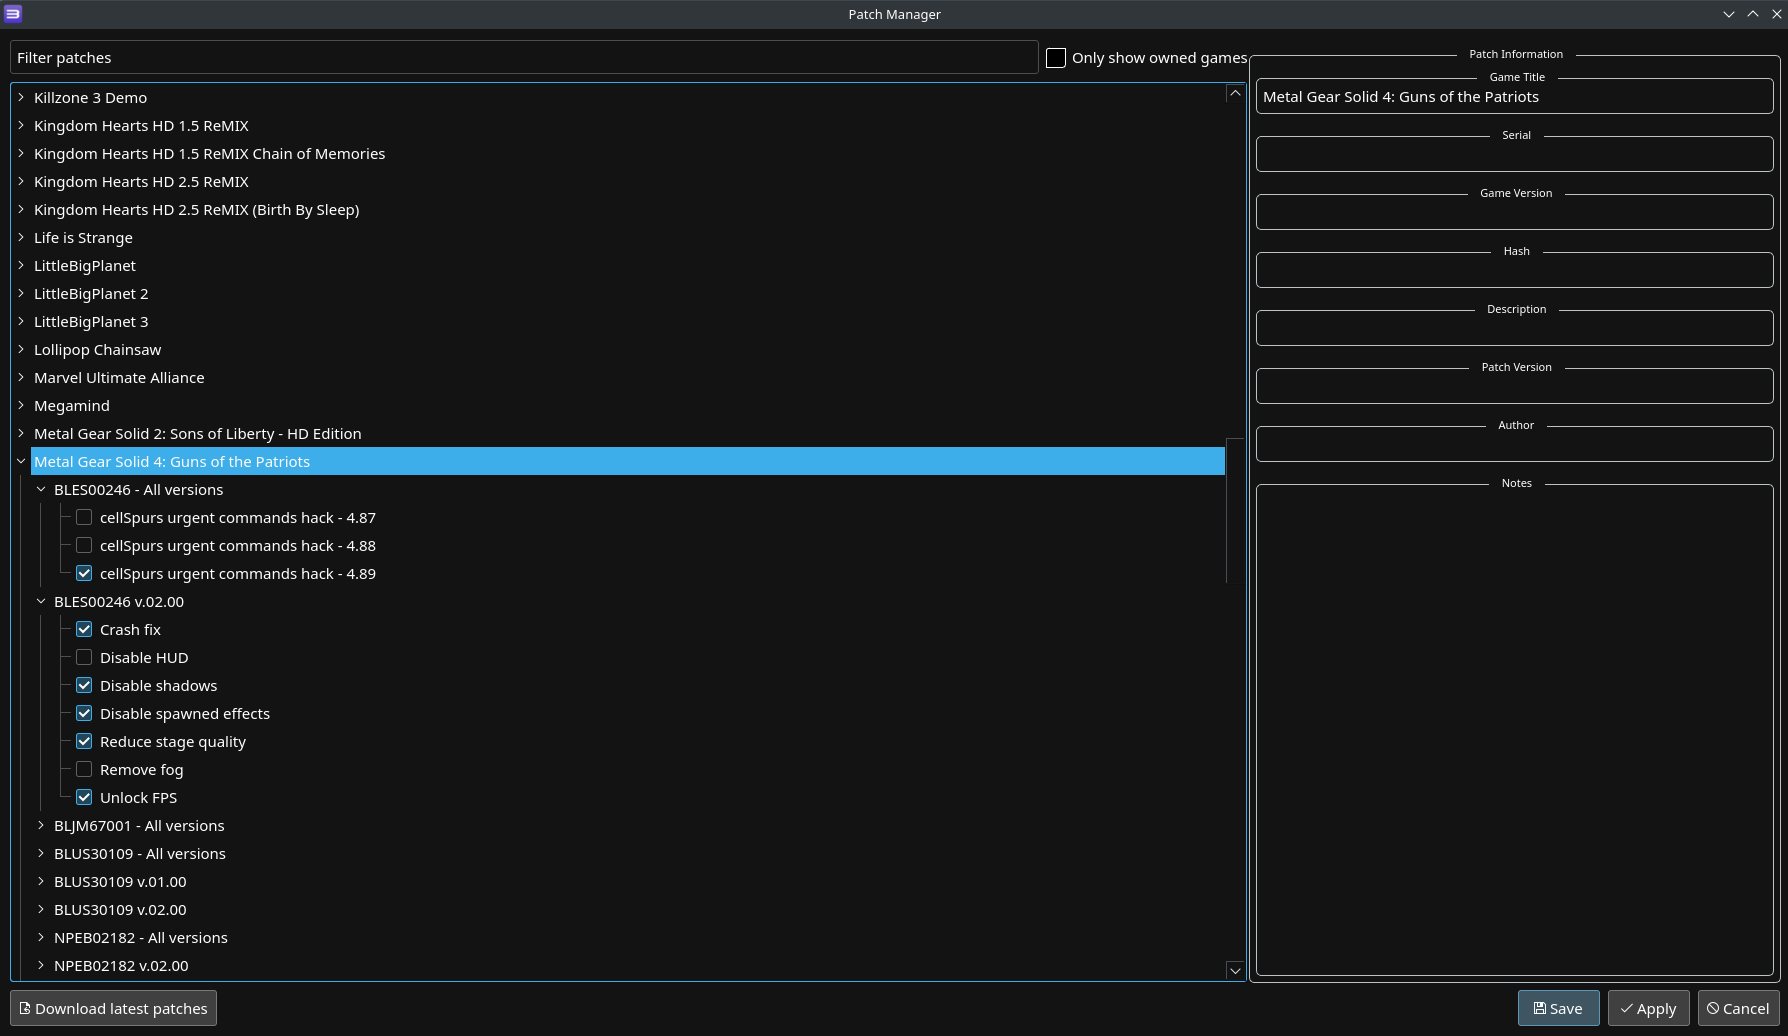
- Apply and Save your patch settings then run the game
- Here are the current GPU settings I have tested but are still yet to be optimized
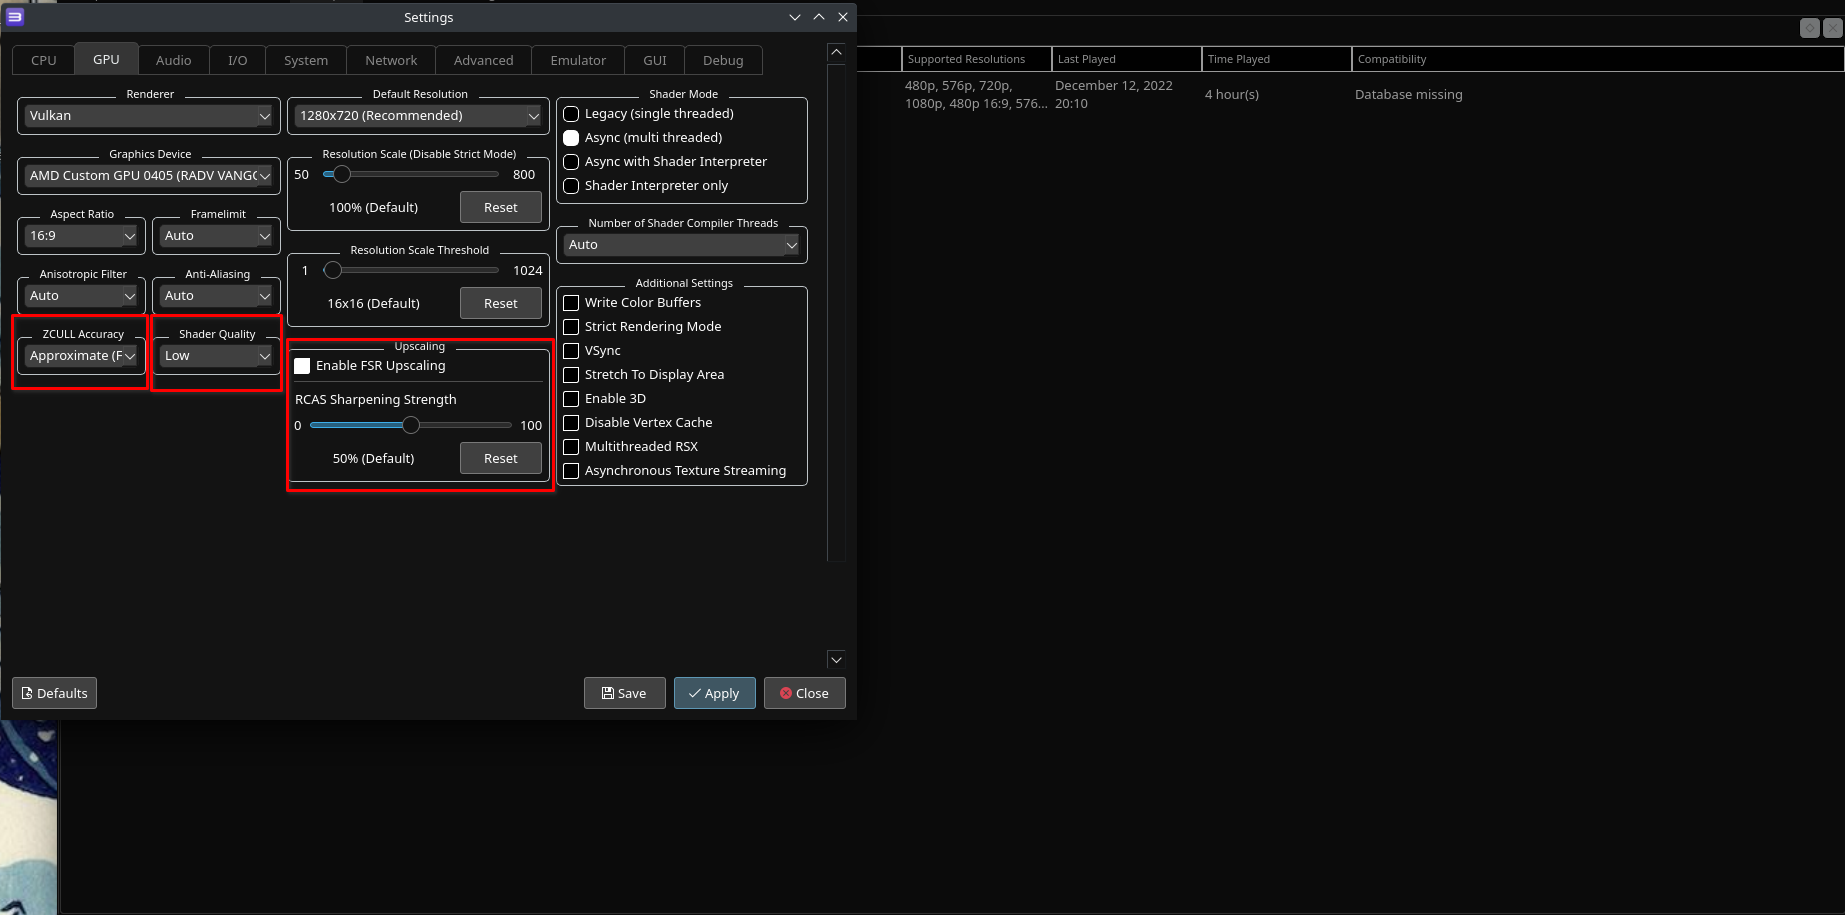
The game takes ~2 hours to install initially so be ready for a long wait
I recommend adding all the patches to boost performance as much as possible. This game is really hard to run so you need all the help you can get.
These are just the settings I got to work, maybe mess around with it and let me know if something works better and I can update this guide.
Good luck out there, this game will work now albeit running kinda like trash, there's a lot of frame inconsistencies and audio either cutting out or missing altogether but it is technically able to be played (though I would not consider it above the threshold of "playable") I think the results are promising and with some community tweaking we can get this masterpiece to generally playable state on steam deck.
You can find the guide here: https://github.com/dragoonDorise/EmuDeck/wiki/Metal-Gear-Solid-4---RPCS3-Setup-Guide.
Yuzu (Nintendo Switch)
The Legend Of Zelda: Link's Awakening
Credit: SardineCat
Recommended Settings
- Yuzu on portable mode (idk if docked loses somes frames)
- accuracy on high, cpu on unsafe,
- make sure you have powertools and then use smt off
- use v1.0.0 of the game
Recommended Mods
- How to install mods
- This mod disables the blur effect which also increases some performance giving you some frames back: https://cdn.discordapp.com/attachments/356187763139280896/798516893840965632/Blur_Removal.zip
- The 60fps mod found here: https://cdn.discordapp.com/attachments/356187763139280896/724250990928461834/Stable-60fps-v2.zip
How well does the game perform after these tweaks?
- This all equates to 60fps almost everywhere, I lose a couple of frames in Mabe Village and Animal Village but its not a big deal IMO.
- Fixes the invisible Chain Chomp bug
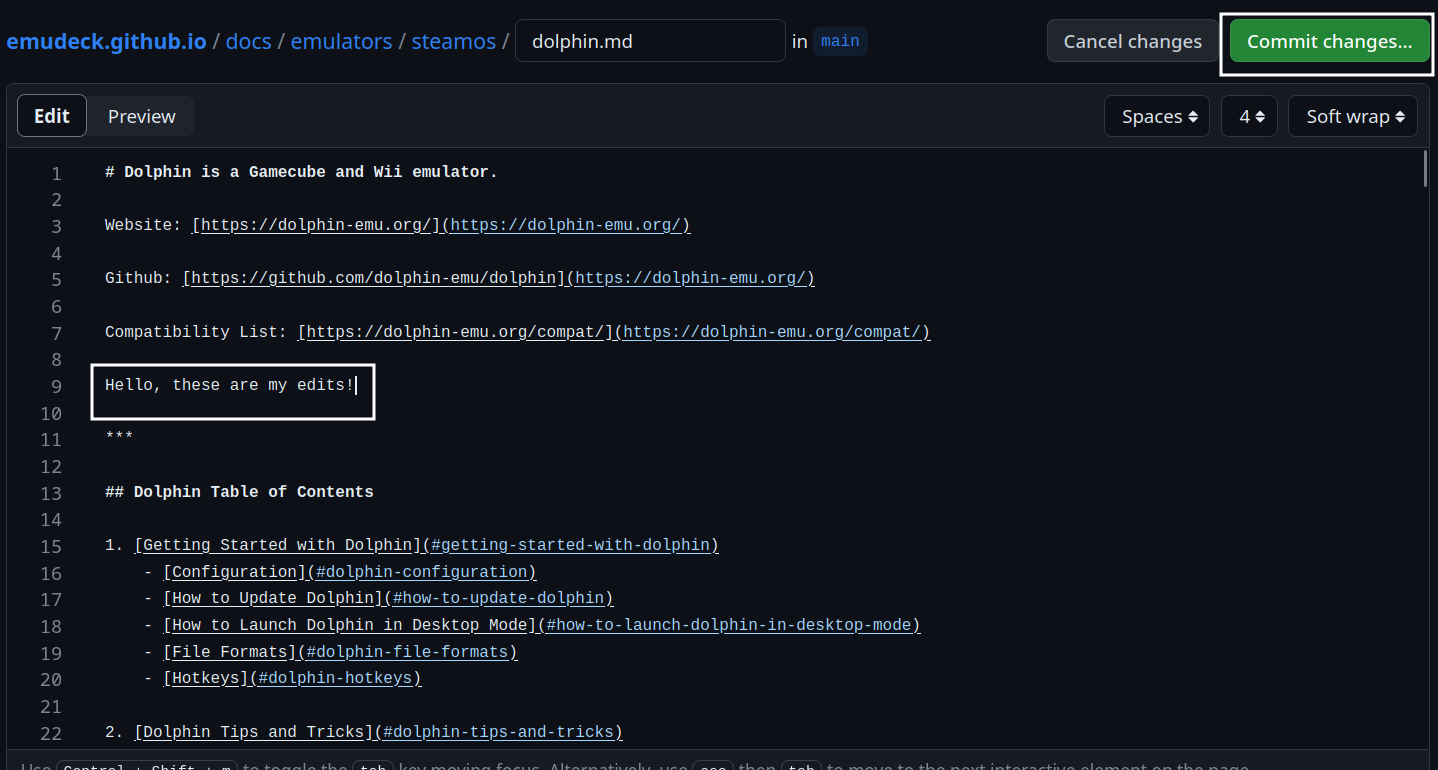
How to Contribute to This Page
You will need to create a GitHub account first. To sign up for GitHub, see https://github.com/signup.
- Open https://github.com/EmuDeck/emudeck.github.io/blob/main/docs/community-creations/steamos/community-creations.md
- Click the
Pencilicon in the top right - Create a new section header below the most recently added section under the respective category using three
###and the name of the section after the three###- For example,
### My Amazing Community Game Configuration! - Your section will automatically be added to the Table of Contents
- For example,
- Write your section under your newly created header
- Once you are finished making your changes, click the
Commit changes...button in the top right - You will be prompted to create a Pull Request. Add a little bit of detail about what you added and why
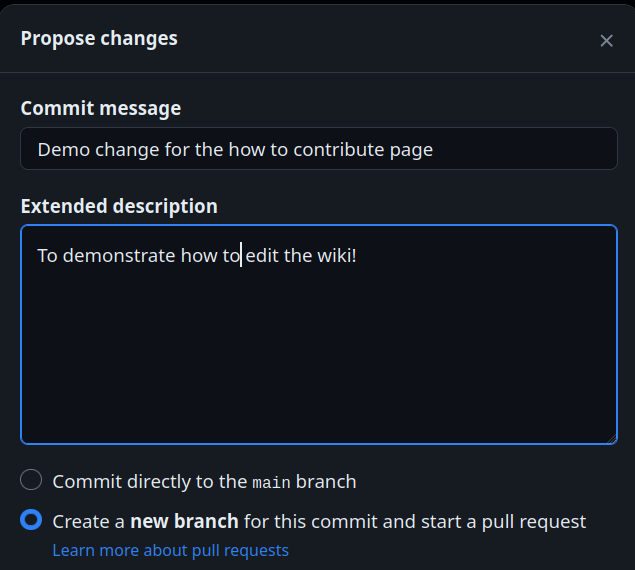
- You will not see the option to
Commit directly to the main branchso do not worry about inadvertently making any changes
- Submit your Pull Request
- Once your Pull Request is reviewed, it will be merged and any of your changes will automatically be deployed to this page